Blog Homepage / no category
Blisters, Cuts and Joint Pain: How to Prevent and Treat Common Hiking Injuries

 When planning a hike, of course you want to think about all of the fun you’ll have and beautiful nature you’ll see. But smart hikers are also prepared to respond to a variety of unplanned situations, including injuries, so don’t forget to learn what to do in case something not so great happens along the trail. First things first: on every hike, make sure to keep a well-stocked first aid kit in your pack, even if you’re just venturing out for a couple of easy miles. You never know what’ll happen, so it’s better to be over-prepared than to need something and not have it. The same goes for knowledge of hiking injuries: you hope you’ll never get hurt on the trail, but it’s good to have information tucked away just in case. This guide will introduce you to a few common hiking injuries and offer tips for preventing and treating them.
Blisters
Moisture plus friction, pressure and warmth is a surefire way to get blisters while hiking. Dealing with blisters in the middle of a hike is painful, so take these steps as preventative measures:
- Choose the right shoes. Select hiking boots that really fit and have advanced technology. GORE-TEX boots are waterproof but also breathable, allowing sweat to escape, which reduces moisture that can cause blisters. Try on several pairs in store with the socks you plan to wear, and ask a sales associate for advice if you’re not sure which pair is best for you. If you find a shoe that you love but it’s a little too roomy, experiment with different insoles.
- Choose the right socks. A great pair of socks will have a snug fit, wick moisture, add appropriate cushion, and help keep your feet at a comfortable temperature. Merino wool — or a merino-synthetic blend — is highly recommended. Absolutely avoid cotton, as this material will keep sweat close to your skin. Moist skin is a breeding ground for blisters.
- Break in your hiking boots. Going on a long hike with new, too-stiff hiking boots will cause pressure and friction on your feet, resulting in blisters.
- Trim your toenails and wash your feet. Cleaner feet are happier feet on every hike — and clipping toenails also helps prevent pain resulting from your long nails jamming into the front of your boots when you hike downhill.
- To reduce friction, some hikers rub a thin layer of salve or lubricant (such as Vaseline or BodyGlide) over their feet before putting on their socks. Other hikers don’t like the feeling, so give this tip a trial run before heading out on a long hike.
- Keep a pair of dry socks on hand in case the ones you’re wearing grow too damp. Let your feet air-dry between changes.
- Address hot spots immediately. A hot spot is a red, irritated patch of skin that is the precursor to a blister. It might sound crazy, but applying a few layers of duct tape over the affected spot can work wonders and is generally more durable than moleskin. Some hikers pre-tape their feet in spots where they tend to develop hot spots.
If the hot spot is really raw and looks as if it’s one step away from becoming a blister, apply some antibiotic ointment, cover it with a bandage, and then add the duct tape (or moleskin with duct tape over it). Never put moleskin or duct tape directly over a blister. If you do end up getting a blister, find a spot where you can sit and attend to it so it doesn’t get worse or pop inside of your boots. If the blister is small and relatively painless, the bandage-and-tape method should do the trick. For a large, painful blister that’s likely to pop, you should drain the blister immediately. First, clean the affected area with an antiseptic towelette or some good old-fashioned soap and water. Then, sterilize a needle or small blade by applying a flame with a lighter until it’s glowing red. Let the sterilized instrument cool, and then use it to puncture the bottom of the blister and drain the fluid. Use a clean towel or tissue to absorb the liquid. After the blister is clean and dry, apply antibiotic ointment, a layer of bandage or gauze, and tape.
Minor cuts and abrasions
Scrapes, cuts and bruises are hard to completely avoid when you spend time in the outdoors. So when you break the skin, don’t let dirt and bacteria make themselves at home in your wound. Immediately treat the abrasion to avoid infection. Here’s how:
- Find a place slightly off-trail to sit and clean your wound. If it’s still bleeding, apply pressure with a sterile pad or piece of gauze until it stops. Lightly pour water over the cut until it’s clear of debris.
- Let the scrape air-dry or pat it dry with a sterile pad. Apply an antibiotic ointment such as Neosporin.
- Dress the wound with a sterile bandage. Routinely replace dirty bandages.
For deep cuts, you may need to head home for better treatment or seek medical attention. All hikers should stay up to date with tetanus shots, which are recommended every 10 years. Bacteria that cause tetanus can be found in soil, so a dirty wound received outdoors could be fostering the disease. Tetanus is a nasty disease that causes muscle tightening throughout the body, and can lead to death — so don’t delay your shots.
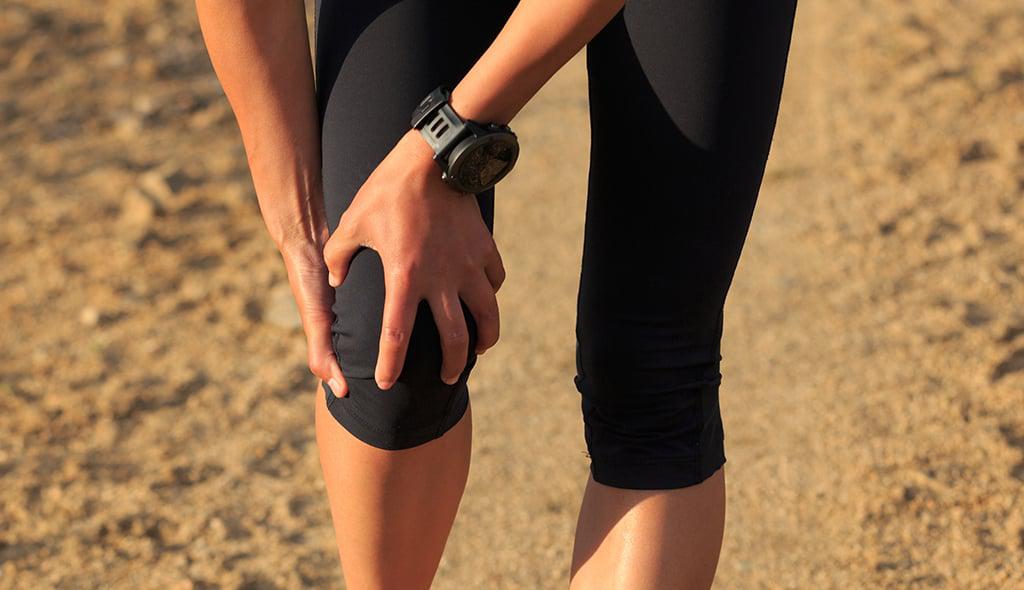
Knee Pain
Sore or downright painful knees in the middle of a hike are never fun. Knee pain can be caused by a variety of issues, including torn cartilage, over-pronation, damaged ligaments, medical conditions (e.g., arthritis), strains, and overuse. Hiking at an incline for a long period of time puts a lot of stress on your knees and can cause them to become overworked and painful. It’s important to know your limits and prepare your body for hikes. Staying in shape and maintaining a healthy diet and body weight does wonders for your knees. Extra weight puts extra stress on your knees. This goes for backpack weight, too — pack light and your knees will thank you. Furthermore, work out your leg muscles consistently. Strong and balanced quadriceps and hamstrings will support your knees by holding the joint in an optimal position and helping to absorb some of the shock of hiking. Our hiking workout guide outlines several excellent exercises to strengthen your legs, including downhill lunges, goblet squats, and kettlebell deadlifts. Consider products that are designed to support your knees. Many hikers swear by trekking poles to take some of the strain off of their knees. Used correctly, trekking poles can add stabilization and make downhill hiking easier on your knees, even more so when you’re carrying a heavy pack. In addition, a knee brace such as the Cho-Pat Dual Action Knee Strap can be a lifesaver on the trail. Knee braces are sold in a wide variety of styles, but they are all meant to stabilize the knee. Lastly, ensure that your hiking boots fit well, are in good shape, and provide shock absorption. If you experience frequent knee pain, even on easy hikes, a physical therapist could create an individualized treatment and prevention plan with you.
Ankle Pain
A slip, fall, or wrong step could leave your ankle hurt during a hike. Common ankle injuries are sprains (when your ligaments are torn or stretched) and strains (an injury to a muscle or tendon). Both of these injuries have the potential to put an end to your hike or make the hobble back to your car quite painful. Ankle injuries aren’t a given on a hike — there are things you can do to lessen the chance of that happening. As with your knees, you want to make sure that the muscles and tendons surrounding your ankles are strong and flexible. Adding simple exercises into your workouts can help a lot. Here are a few to try:
- Ankle circles: Sit in a chair and lift one leg straight. Rotate your ankle clockwise 15 times, take a short rest, and then rotate the same ankle counterclockwise 15 times. Do the same with your other ankle. Add variation by writing the alphabet with each ankle.
- Peroneal stretch: Your peroneal tendon runs along your outer ankle. To stretch this tendon, rotate your feet inward and gently walk along the outside of your feet for a minute.
- Achilles stretch: Your Achilles tendon attaches the calf muscle to the heel bone. To keep it flexible, sit on the ground and fold one leg in so the foot is resting inside your opposite thigh. Put a strap or towel around the foot that’s straight out, and gently pull your toes closer to your leg, feeling the stretch. Hold the stretch for 15 seconds, and repeat three or four times. Do this on both legs.
In addition to strengthening your ankles, consider high-top hiking boots that offer ankle support and replace worn-out boots. Take your time hiking, especially in rocky areas or when light is low. Ankle braces can be worn as extra stabilization if needed, especially if you’ve previously injured your ankle. Even if you hike with care, accidents can happen. Mild ankle injuries can be treated mid-hike using a system called RICE, which is an acronym every hiker should keep in their mental toolbox. Here’s a breakdown:
- Rest: Find a place to sit and rest the ankle.
- Ice: If available, lightly rub the ankle with ice wrapped in a cloth. Most likely you won’t have access to ice during a hike, so get creative. Is snow available? Can you soak a cloth in cold water from a stream or water bottle? Ice or cold water should be applied for 20 minutes at the most every few hours.
- Compression: Use an ankle brace if you have it, or wrap the affected area in an elastic bandage. Compressing the ankle helps control swelling and adds support to the joint. Don’t wrap the bandage too tight — you don’t want to cut off blood flow.
- Elevation: While in a reclining position, prop up the affected ankle so it’s resting above your heart.
Follow these steps for 20 to 30 minutes, and then wait several minutes before trying to bear weight on the ankle again. If you do get up and moving and find that it’s possible without too much pain, use trekking poles or a hiking staff if available to help take the weight off of your ankle. Distribute some of your pack weight to friends or family members. Serious injuries with severe pain require the joint to be immobilized and the hiker to be evacuated. With any ankle injury, it’s best to see a doctor as quickly as possible so it doesn’t get worse. Re-injury is most common in the year following a sprained ankle, according to the Scandinavian Journal of Medicine & Science in Sports. If you injure yourself, take special care during that period and follow your doctor’s directions.
Conclusion
When preparing for hikes, it’s best to think proactively rather than reactively and make efforts to avoid injury. With preventative measures, your hikes should be smooth sailing. Still, knowledge is power — especially in the middle of the wilderness without Internet access to look up what to do if you or someone in your hiking party gets hurt. Preparing yourself and your family to prevent and treat common hiking injuries can go a long way to having happy, successful outdoor adventures.