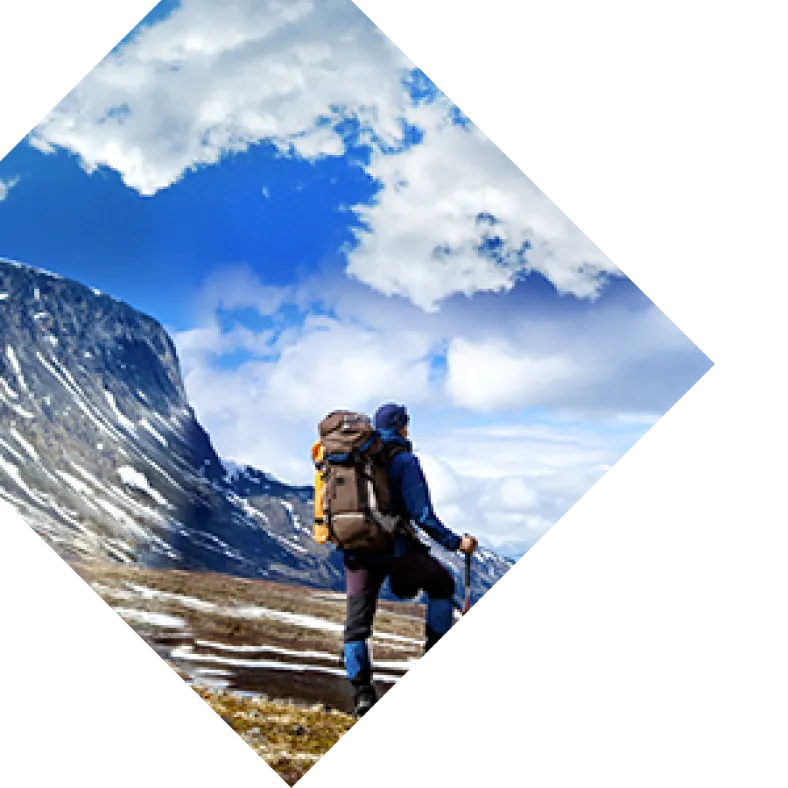
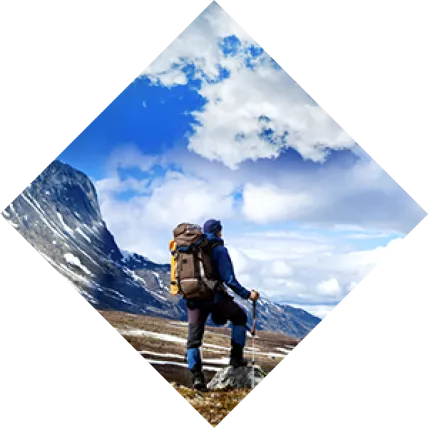
 When you’re new to backpacking, everything about it can seem daunting. It’s hard to know where to start with so many skills to learn and so much gear to buy. But don’t let that deter you; you don’t have to start with the Pacific Crest Trail. Backpacking is incredibly rewarding and can enrich your life in ways you never expected. Plus, spending time in nature is actually proven to have a positive effect on health and happiness.
Beginner Backpacking Guide and Checklist
In this article, you’ll learn the who, what, and where of backpacking for beginners—along with plenty of advice and recommendations—to start you on the right path. Use the backpacking guide below to prepare for your trip. (Click to jump to section.) Table of Contents
- Considerations When Planning a Backpacking Trip
- What Gear Should You Bring?
- Final Tips for a Fun and Safe Backpacking Experience
For a full, detailed backpacking checklist, see The Handy Dandy Backpacking Checklist.
Considerations When Planning a Backpacking Trip
Who Are You Going With?
Using the “buddy system” when backpacking, especially as a beginner, is essential in case things go south. Think about it: What happens if you fall and break your leg? If a tumbling rock knocks you unconscious? A partner can find help in case of trouble. Plus, it can be a lot more fun backpacking with a friend or as a group. Preferably, choose a partner who is more experienced than you and can teach you skills along the way. If you don’t have any backpacking friends, find a friend who is interested, and stick with well-defined routes and short trips until you feel comfortable taking on a more challenging trek. Being alone in the wilderness has its appeal, but it comes with extreme risk. If you’re bringing the kids along, check out this article: Backpacking with Kids: How to Plan the Best Family Adventure.
How Long Are You Going For?
Only have a weekend to spare? That’s perfect! Going on short trips to build expertise is a great choice for beginners. That way, you’ll be able to test your skills without wandering too far, and know for sure if your backpack feels comfortable, if your hiking boots fit correctly, if you’re bringing the right gear, and the right amount of it. Little by little, you’ll feel at ease taking on longer trips and venturing further afield.
Where Are You Going?
There’s a lot to consider when planning your path. As a beginner, don’t force yourself to tackle the toughest terrain. You can work up to where you want to be. For example, if you’re new to reading topographic maps and using a compass, it’s a good idea to stick to a trail with campsites rather than setting out into the trail-less wilderness. As you gain expertise, you’ll feel more confident creating your own path through the backcountry. When charting a route, keep the following elements in mind:
- Fitness level: Know what you can handle and plan accordingly. It’s smart to train and test your limits on day hikes, especially with a backpack loaded with gear. Hiking with a heavy pack is much harder than hiking with a water bottle and a couple of snacks.
- Distance: Decide how many hours per day you can hike, and then figure out how many miles you can reasonably cross in that time. The rule of thumb for hiking is to allot 20 minutes per mile for flat, easy terrain. Add in a hefty backpack, difficult or steep topography, weather challenges, and time for meals or breaks, and you’re looking at much longer than that baseline.
- Elevation gain: Some trails will have you hiking uphill—both ways. Be aware of any injuries you may have (e.g. bad knees) that would make climbs or descents problematic. Don’t merely check the elevation change over the whole distance of the hike; see how quickly the change happens. An elevation gain of 1,000 feet over a distance of 5 miles isn’t so bad, but that same elevation gain over 1 mile is steep and grueling.
- Trail obstacles: Learn if there is anything on your path that would prove to be a special challenge, such as a water crossing. Rivers are no joke. Even small streams can be hard to cross, especially if there has recently been heavy rain or melting snow. Make sure to read up on hypothermia if you’re planning a trip that could end up with you being wet or cold at all.
- Weather: Don’t hesitate to change your route or choose a different location altogether if there’s a storm in the forecast.
- Time of year: Depending on where you’re going, the season can drastically affect what the landscape is like. If you’re backpacking on a trail or in a national park, check if it’s open year-round. Keep in mind that you won’t have as much daylight during fall and winter.
- Trail type: If you want to explore different terrain the whole time, go for a loop trail. Otherwise, pick a there-and-back or point-to-point trail. Point-to-point trails will require you to take a shuttle or arrange a ride back to your starting location.
What Gear Should You Bring?
Backpacking isn’t like car camping or traditional camping. When backpacking, your gear needs to be lighter, smaller, and more durable; each item is carefully chosen for maximum quality and efficiency. It’s a far cry from rolling up to your campsite, setting up a bulky six-person tent just for you and another friend, and throwing all of the blankets you own inside. Choosing the right gear takes a lot of research and consideration. But after slimming down, you’ll be proud that you fit everything you need for the coming days on your back. Below you’ll find an introduction to some of the most basic gear you need for any backpacking trip. For a quick but more exhaustive checklist, take a look at our Handy Dandy Backpacking Checklist. Always test out all gear before using it on a backpacking trip. Always.
Basic Gear
Backpacks are measured in both size and capacity (in liters). I am a petite person and wear an XS, 56-liter Gregory Deva 60 backpack, and it’s served me well for single-night and multi-night journeys. For most backpacking trips, a 50-70 liter backpack should be sufficient or even more than enough. When selecting a backpack, it’s essential that you get the right fit. The only way to find this out is to actually go to a store and try on several backpacks, while working with an experienced salesperson or backpacking friend who can help you adjust the pack to your body, as well as load the pack with weights to mimic how it will feel filled with gear. Never blindly order your backpack online unless you’re prepared for the possibility that you’ll have to make at least one return. Your hips and shoulders will thank you for taking the time to find a comfortable pack. Tent: Will you be sharing a tent, or sleeping in your own? Sharing a tent can help minimize weight, as you and your friend can split the load. Unless you are planning on camping in the dead of winter, a 3-season tent should be sufficient. I like the REI Half Dome 2 Tent. It has held up for years in many different types of weather, is easy to set up, and is surprisingly roomy for how light it is. A footprint can help the bottom of your tent resist wear and tear from abrasion and rocky surfaces.
Sleeping Gear
When choosing a sleeping bag, focus on bags that are lightweight, compressible, and warm. Contoured, mummy-shaped sleeping bags are ideal for backpacking. They are lighter than rectangular-shaped bags because they minimize the amount of material used, and warmer because they are closer to your body, which decreases the amount of air you must keep warm inside the bag. Shape of the bag aside, there is a lot to consider when choosing a sleeping bag. Goose-down or synthetic insulation? What temperature rating to pick? Your decision will depend on the conditions you are planning to camp in, how lightweight you want the bag to be, and what you can afford. A sleeping pad will not only keep you more comfortable than snoozing on the ground, but will also keep you warmer. I’ve experimented with different pads over the past few years, and recommend a self-inflating pad, which only takes a few breaths to fully inflate after unrolled. I’ve tried sleeping pads that I had to completely inflate myself, but those have always ended up with some mysterious leak that neither I nor the manufacturer could locate. Compact and weighing a little more than a pound, my current favorite is the Therm-a-Rest ProLite Plus Sleeping Pad.
Food
Every backpacker has go-to food that they bring on a trip. Eventually, you’ll find your favorite foods that are lightweight, tasty, energy-rich, and nutritious. Here are some basics:
- Dehydrated meals: I’m constantly surprised by how good dehydrated meals actually taste. Or maybe they taste so good because I’m eating them after a strenuous day of hiking. Either way, I never leave for a backpacking trip without at least a couple of these in tow. Look for pouches that have measurement markers on the side, such as those by AlpineAire Foods. Markers take the guesswork out of adding the right amount of water to the dried ingredients, because who brings a measuring cup on the trail? Note that in higher elevations, you’ll need to use more water.
- Trail mix with lots of nuts and dried fruits.
- Oatmeal
- Energy bars
- Instant coffee or tea
- Treats: If you decide it’s worth the weight, bring something indulgent to nibble on as a pick-me-up when you need it. One of my friends has made it a backpacking tradition to cook a can of Spam at the end of the day.
Always pack more food than you think you’ll need. For example, if you plan on camping for two days, pack enough food for three. Also, remember that everything you pack in, you need to pack out, so remove any excess packaging at home to limit your trash. Cooking Supplies:
- Stove: I bring my trusty 3-ounce MSR PocketRocket Backpacking Stove on every trip.
- Fuel: I like the 8-ounce cans even for short trips. They provide a more stable base for the stove and pot than smaller varieties, which can come in handy with windy weather or uneven terrain. Make sure to bring a lighter and matches to light the stove. (These should be in your emergency kit anyway.)
- Pot: I’ve used the GSI Outdoors Halulite Minimalist Cookset for years. The set-up is small and light, and still capable of boiling enough water for a dehydrated meal.
- Utensils: A long-stemmed fork or spork is ideal for reaching into your pot or dehydrated meal pouch.
- Mug: An enamelware camping mug will cover most of your needs. Unless you’re planning on cooking something complicated, you can usually eat or drink out of your food pouch, pot or mug.
Water
Water is heavy: a 3-liter CamelBak reservoir, filled completely with room-temperature water, weighs around 7 pounds. You’ll be much happier if you don’t carry all the water you need for the trip on your back. Plan to bring some water, and gather and treat water from sources such as streams and lakes along the way. Choose your point of water collection carefully. In a water purification guide, the National Park Service stresses the importance of avoiding colorful water, as with an algae bloom, or water that has a powerful “organic” smell. Furthermore, the guide states: “Microorganisms are concentrated in stagnant water, such as eddies along river or stream banks, and along lake shores where the water may be shallow and warm.” Seek out the clearest water you can, preferably from flowing sources. Simply boiling the water kills bacteria, parasites, and viruses, but that method requires extra fuel and extra time. To make the water safe, you must bring it to a rolling boil for at least one minute and then wait for it to cool down if you plan on drinking it. Consider investing in a pump filter, gravity filter, ultraviolet light purifier, bottle filter or chlorine dioxide tablets. Each type of filter or purifier has its pros and cons, so don’t choose randomly.
Navigation
Always carry a paper map, even if you don’t plan on deviating from a trail. Better yet, learn how to read topographic maps and use a compass. Topographic maps are valuable because they show geographic features and use contour lines to depict changes in the earth’s surface, such as mountains or valleys. Contour lines can even show you how steep a mountainside is. There are plenty of online resources to help you read maps, as well as in-person classes where you can learn from an expert. Technology can fail, so don’t rely on a GPS device.
Clothing
Even if you’re setting out on a sunny day in the middle of summer, always bring layers and be prepared for the weather to change. Check out these essential clothing items to get you started:
- Base layer: Bring a set of long underwear, which can double as pajamas. Focus on moisture-wicking fabrics that move sweat away from your body.
- Insulating layer: Pack at least one warm layer made of classic fleece, Merino wool, or goose-down.
- Pants: Backpacking pants should be comfortable and durable. Own at least one pair of light, quick-drying pants, especially zip-offs that can turn into shorts at a moment’s notice. (Remember, this isn’t a fashion show!) Jeans are not a good choice for backpacking because they limit movement and are made of cotton, a material that is heavy and takes a long time to dry.
- Rainwear: Little dampens the spirits on a backpacking trip faster than a sudden downpour that you’re not prepared for. Soggy, wet clothes are not only uncomfortable but can also quicken the onset of hypothermia. Equip yourself with a lightweight, packable rain jacket and rain pants that will keep you dry. The North Face Dryzzle Jacket is a durable choice that’s made with a waterproof, breathable GORE-TEX membrane for ultimate performance in wet weather.
- Hat: Bring a sun hat and a warm beanie. The Marmot Windstopper Beanie only weighs 1 ounce and uses WINDSTOPPER® fabric to shield your noggin from frigid gusts.
- Gloves: Gloves may not be necessary during the summer, but are smart to carry in case the weather gets cold or wet. For a heavy-duty option, the Marmot Chute Glove is waterproof, windproof, and breathable.
- Socks: Lightweight or midweight hiking/backpacking socks work well for most situations. Wool socks stay warm when wet, and Merino wool has the added benefit of being soft and not scratchy. If possible, try on a few pairs before deciding to make sure you get a snug fit and an appropriate amount of cushion.
Footwear
The perfect hiking boots can be hard to find. Similar to choosing a backpack, take the time to try on several styles in-store to find a pair that fits well and has the qualities you need. Depending on your anatomy, you might not find boots that feel wonderful straight out of the box. Many people need to customize their pair by adding a pad or new insoles, stretching the shoes, or making other adjustments. Break in your hiking boots before going on a long trip. Wear them around your house, while running errands, and on smaller hikes until they feel more flexible and comfortable. The Vasque Breeze 2.0 Mid GTX® Boot is a favorite among my backpacking friends, as it’s lightweight, rugged, and keeps water out while letting your feet breathe. Consider bringing another pair of shoes, such as Chaco sandals, to wear after you set up camp, for late-night bathroom runs, or for crossing creeks (if they’re deep enough to let water to come in through the top of your boots). Need hiking boots? How to Choose Hiking Boots offers great info on how to find the perfect boots for your next adventure.
Other Gear
Remember, this is an introduction to backpacking gear, not a checklist of every item you could possibly need. With that said, here are a couple other items you might not have thought of bringing on a backpacking trip:
- In case of emergency, a personal locator beacon (PLB) or satellite messenger can send a distress signal or location coordinates to the outside world. If this is something you might want, research which device is best for you, because they aren’t interchangeable.
- Duct tape works well for emergency repairs on damaged or ripped gear. Instead of carrying an entire roll, wrap a few yards around a water bottle or small strip of cardboard.
- Carry dry bags to protect electronics and other sensitive items from rain.
- In a pinch, plastic bags can guard against clothing getting soaked. Plus, you’ll want one for trash.
- An emergency space blanket is inexpensive, tiny, weighs only 2-3 ounces, and has multiple uses: retaining your body heat in cold weather, acting as a brightly colored signal in emergencies, or functioning as a footprint for your tent when rain is heavier than expected.
Final Tips for a Fun and Safe Backpacking Experience
Always tell family or friends about your route, how long you plan to be gone, and what to do if they don’t hear from you by the expected time. This is important even if you’re just leaving for the weekend. Know when to stop. Trust your intuition. If you don’t feel comfortable proceeding on your planned path, adjust your route or turn back. There’s no shame in being safe. Be aware of animals you might see along your trek, and learn how to react to them. For example, if you’re backpacking in bear country, review the National Park Service safety guide that outlines how to avoid bear encounters, and what to do if you see them in close range. You will also need to learn food storage techniques so hungry animals don’t ruin your trip. Backpacking might seem complicated at first, but life is really so much simpler out on the trail, when you’re immersed in nature, trusting yourself and your abilities, alongside people whose company you enjoy. Being out in the wild is one of the most fun, exhilarating, and even peaceful experiences you can have, as long as you prepare with care.