Tying your shoes is simple, right? You’ve been doing it for years and probably never thought twice about it. When it comes to lacing and knotting your hiking boots, though, things are a bit different. You have to make sure your foot is securely fastened inside the boot so that it won’t slip and cause blisters, while also paying careful attention to the dimensions of your foot and places that tend to swell. Thinking of tying your shoes that way can make it seem overwhelming. Overly complicated. But really, it’s all about listening to your body, giving it what it needs, and yes — this can be done with something as simple as lacing your boots. Doing a quick Google of "how to lace hiking boots" search yielded lacing technique upon lacing technique. After trying a few, we decided to share a list of our favorites based on what we value most when we’re out on the trail: secure fit, lacing for different feet types, and simplicity.
Hiking Boot Knots
 There are also many knots to when tying your boots, all of them customizable for different situations.
Overhand knot
This is the most common way of locking tension under a knot. You likely learned it when you learned to tie your shoes. Basically, you take the two laces, cross one over the other, loop it underneath the X you just made, and pull the ends away from each other. This creates a loop that holds all your lacing in place below it, and you tie it off however you like.
Surgeon’s knot
A surgeon’s knot accomplishes the same goal as the overhand knot, but is a bit more secure. Basically, you make an overhand knot, then loop a lace underneath one more time. The extra loop creates more friction, and more friction holds more tension. 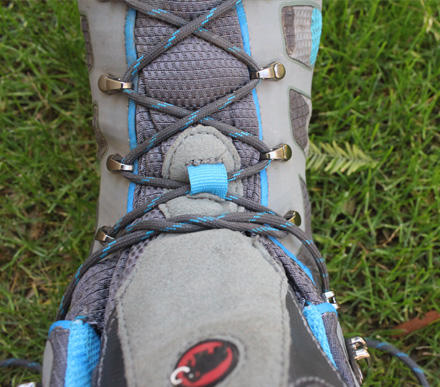 This is a very secure and reliable option if you want to lock off tension below the knot. The Surgeon’s Knot can also be used throughout the tying process after looping around each hook, just be careful to just make sure you leave adequate space between each knot to avoid cutting off circulation.
Granny knot / square knot
The granny knot is the finishing touch on either an overhand knot or a surgeon’s knot. Once you pull your laces tight, take one of them and double it back on itself, creating a “bunny ear.” Wrap the other lace around the bunny ear, using your thumb to create a loop under it. Hold the loose end of the lace against your thumb with your index finger, then use your index finger to push the lace through the loop, creating a second bunny ear. Take hold of one bunny ear with one hand and the other with the opposite hand, then tighten. If the bunny ears run lengthwise along your foot, you’ve tied a granny knot. If they run across your foot width-wise, you’ve tied a square knot. Aiming for a square knot is ideal — it’s the more secure knot of the two.
Quick-Pull Knot
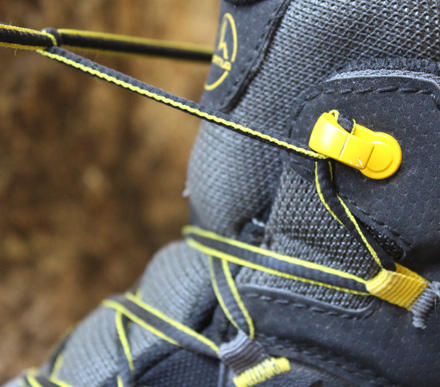
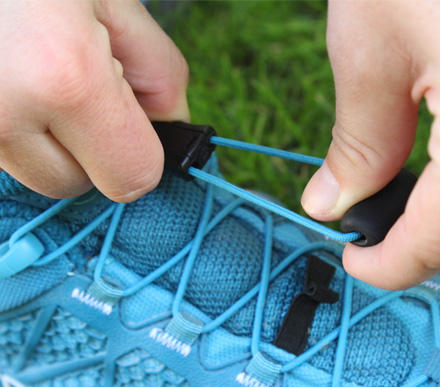 For some hiking boots, like the La Sportiva Synthesis Mid GORE-TEX SURROUND® Boot, you have the pull-cord lacing system. Start by looping around the quick lace hook, and then all you have to do is pull! It’s as simple as that.
The Heel Lock: A Critical Lacing Technique
 This is one of the simplest ways to lace your boots and one of the most crucial. The “heel lock,” also known as the “lace lock,” keeps your heel from sliding up and down and the rest of your foot from sliding back and forth in your boot, both of which could cause friction blisters. It also provides extra stability for “low-volume” or narrow feet. This lock is also great if you want a snug, secure fit around your foot, but still want to avoid cutting off all blood circulation to your feet. You carry out a heel lock by using the top hooks. There are usually two on each side of a boot at the ankle. Lace your boots any way you want up to those hooks, then, instead of crossing the laces diagonally through them, pull them straight up through both hooks. Then cross the laces, pull them down to the lower set of hooks , and tie them. This will place your heel securely in your boot. A heel lock can also be modified for a low-cut boot with eyelets. In these types of boots, the last two eyelets will be next to each other instead of one on top of the other. Pull your laces up through the first eyelet then down through the next eyelet on the same side, but don’t pull them tight — leave a loop. Next you’ll lace back through the loops you made and pull up against them, keeping your heel snug in the boot. Step-by-step directions: 1. Make sure your base laces are tight, real tight. They should feel similar to when you pluck the strings on a guitar, movable but never loose. 2. Next, lace your boots over the top of your foot. Go through one more time and tighten your laces, as you would with the surgeon’s knot. You’ll notice a more secure fit around your ankle and heel at this step.
 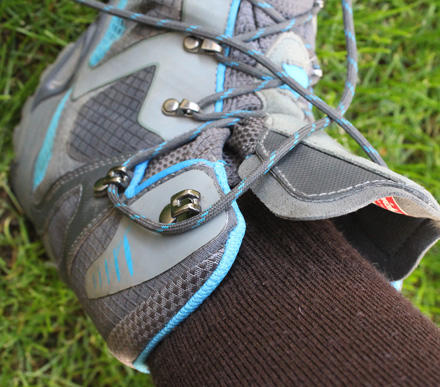 3. Instead of the normal crisscross pattern you’d typically follow, take your laces straight up the quick-lace hooks (see picture). You’re essentially skipping one of the crisscross steps.
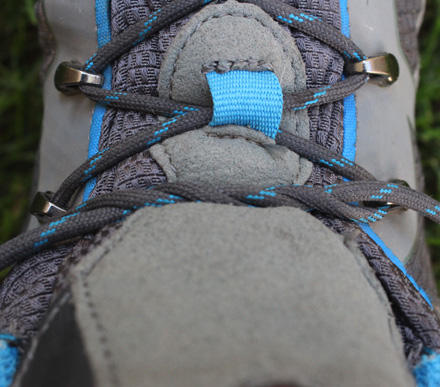
 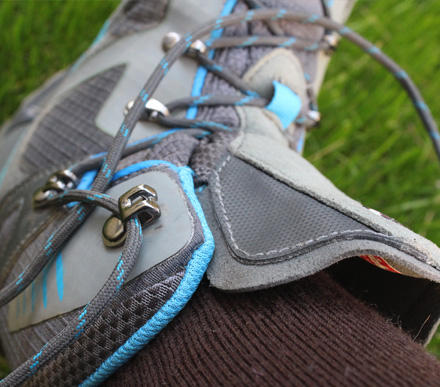 4. Take each lace and loop it under its opposing side (the straight line between your quick-lace hooks). Pull them through and tighten until your heel feels secure. 5. Like step 2, follow the same procedure and lace the top of your boot, making sure to go through one additional time. Proceed to tie your shoe normally and don’t forget to double knot at the end!
 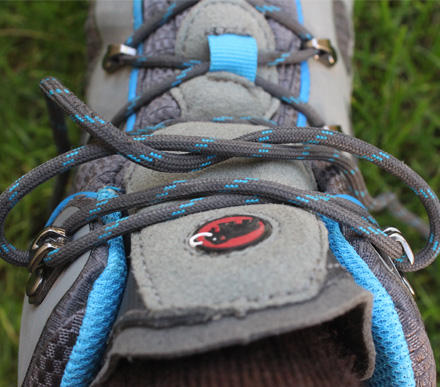 6. If your boot looks like the photo below then you’re done! Walk around and make sure if feels comfortable. Adjust your laces accordingly.
Lacing techniques for unique feet
Every foot is a little different. Luckily there are lacing techniques for every type of foot.
High insteps
This is caused by bone or nerve conditions. It results in your body weight being localized on the ball and heel. Because the arch of the foot is higher than usual, it doesn’t distribute weight the way it ought to. It can cause a great deal of pain, even leading sometimes to plantar fasciitis. Lacing windows relieve the pressure on the arch and create relief. A lacing window is just a fancy name for “not crossing your laces over a particular part of your foot.” Basically, you find the part of your foot that feels compressed or that’s prone to sore spots and instead of lacing diagonally over that area, you pass the laces up an eyelet or a hook vertically. This creates a space in your laces that alleviates the pressure of a high arch. Lacing windows are also effective for other kinds of swelling across the tops of your feet, no matter the cause. Another way to alleviate pressure in your foot is to use parallel lacing. Instead of your boot laces crossing back and forth over each other, they run in parallel lines across the width of your boot. In order to accomplish this, you start by completely unlacing your boots except for the line that runs across the toe. Take one end of your lace and, staying on the same side of the boot, skip one eyelet and bring the lace up through the second one up. Cross the lace over to the other side of the boot and enter it into the eyelet opposite. Then, staying on that side of the boot, skip up one eyelet and bring the lace through the next one. Repeat this pattern with both sides of the shoelace until you’ve laced the entire boot, then tie it off.
Toe-relief lacing
If your toes feel squished, you can fix this by tying your shoe twice. Just like with parallel lacing, you untie your boot all the way down to the line running across the toe. Re-lace your boot halfway up, whichever way feels best to you, then tie it off. Then take a second shoelace and start lacing again at the next eyelet up. Lace the boot all the way to the top with the second shoelace, then tie it off at the top with a heel lock. This allows you to adjust the tension on the toe laces without having to re-tie the entire boot. You can also alleviate toe -pressure by unlacing your boot completely, then re-lacing it, skipping the bottom eyelets and starting at the second ones up.
Cuff pressure
 If you feel excess pressure in the upper part of your boot, above the ankle, you should also consider an alternate method of lacing in order to reduce skin irritation there. In order to alleviate it, finish by bringing the laces over the top of the final hooks and then tying off your boots.
Low Volume
For those that have narrow feet, consider using the low volume knot to create a cushion for your feet. 1. Start by tightening the laces, like guitar strings, where the laces first loop out. 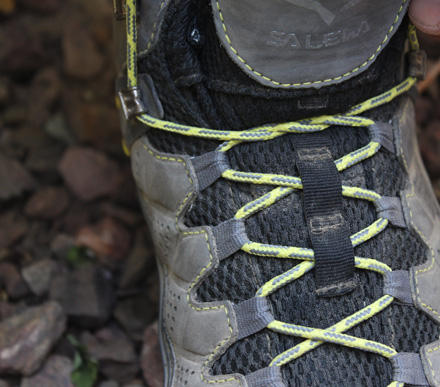 2. Tie a surgeon’s knot to secure the top of your foot. 3. Lace around the first hook top-down. 4. Move on to the next hook, still looping your laces top-down.
 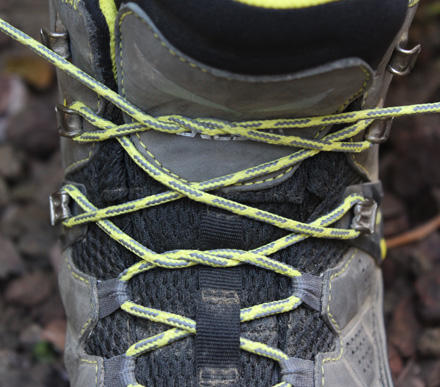 5. Tie a second surgeon’s knot.
 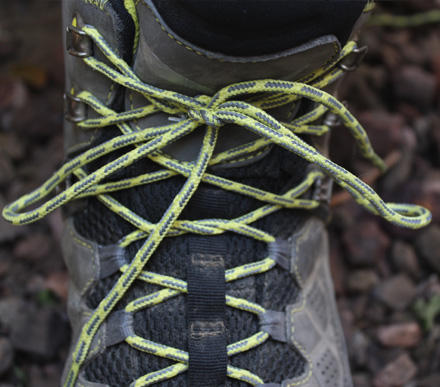 6. Follow this procedure until you reach the top hook and tighten your laces. Notice how this technique holds your foot securely without causing excessive pressure or irritation? Yeah, it’s a life changer.
The Honeymoon Phase
Now that you have a lacing technique to your liking, it might be a good idea to look into some of the other aspects your boots have to offer. Check out some of our comprehensive boot guides for inspiration and practical tips on how to better understand your gear: How to Find Hiking Boots How to Break in Hiking Boots How to Clean Hiking Boots And feel free to share some of your favorite lacing techniques. We’re always looking for new methods, so comment away!